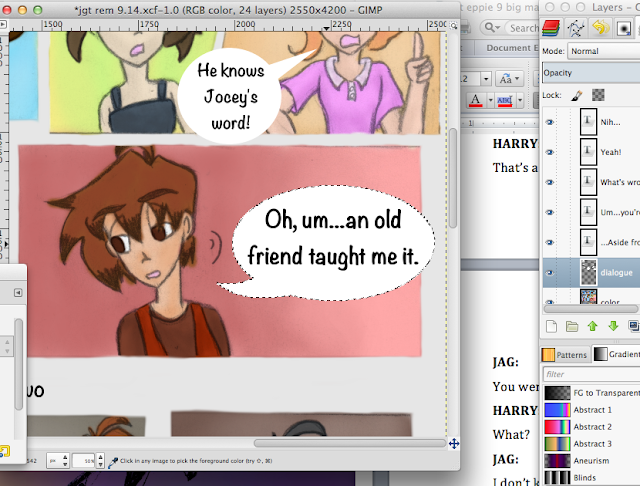
Time to get out the script, cuz next we have to insert the DIALOGUE!
Alright, so once you have reunited with the script, you just use the Text option on your artsy program, and type in the lines wherever you plan on inserting the dialogue bubbles.
This phase, as you can see, isn't that hard to do, but this is usually when I tend to change up/edit some lines for whatever reasons.
After all of the dialogue has been typed in, we then move on to...making our own dialogue bubbles!
I actually learned this technique by 'googling' it. So...didn't coin this, folks! ^^
Making a dialogue bubble takes 3 steps.
1. Make a 'circle' with your 'ellipse/other round shape' select tool. Be sure that all of your dialogue fits!
2. Use the 'Free select' tool to draw on the little tail to the circle.
3. Bucket fill whichever color you want the bubble to be! (I use white...I'm traditional ^^)
After you press 'enter', you got yourself a dialogue bubble!
We're almost done, guys! Just a few more steps left!
Until then,
Genie


No comments:
Post a Comment